Knowledge Base
Save us time to focus on some great new features and try our self service knowledge base. Search for anything.
Knowledge Base
Save us time to focus on some great new features and try our self service knowledge base. Search for anything.
The multisite network feature is a powerful, hidden functionality inside every WordPress system. A multisite allows you to setup separate WP websites inside one WordPress installation. It also can be used for WP Multisite translations.
A Multisite can be used for multiple customer websites or a multilingual setup. Below are two examples of this use cases.
There are many reasons why you can or should use a multisite instead of a single WP site. Here are some benefits of using a multisite instead of other translation plugins:
Setting up a multisite is fairly simple. You need a single, running WP site before. That can be an existing or a complete new site. Then follow these simple steps:
Make sure all files & databases are backed up before creating a multisite.
Add the following line into your wp-config.php file before “/* That’s all, stop editing! Happy blogging. */ “
define( 'WP_ALLOW_MULTISITE', true );
After that refresh your site, go to your backend > Tools > Network setup. Click on Install.
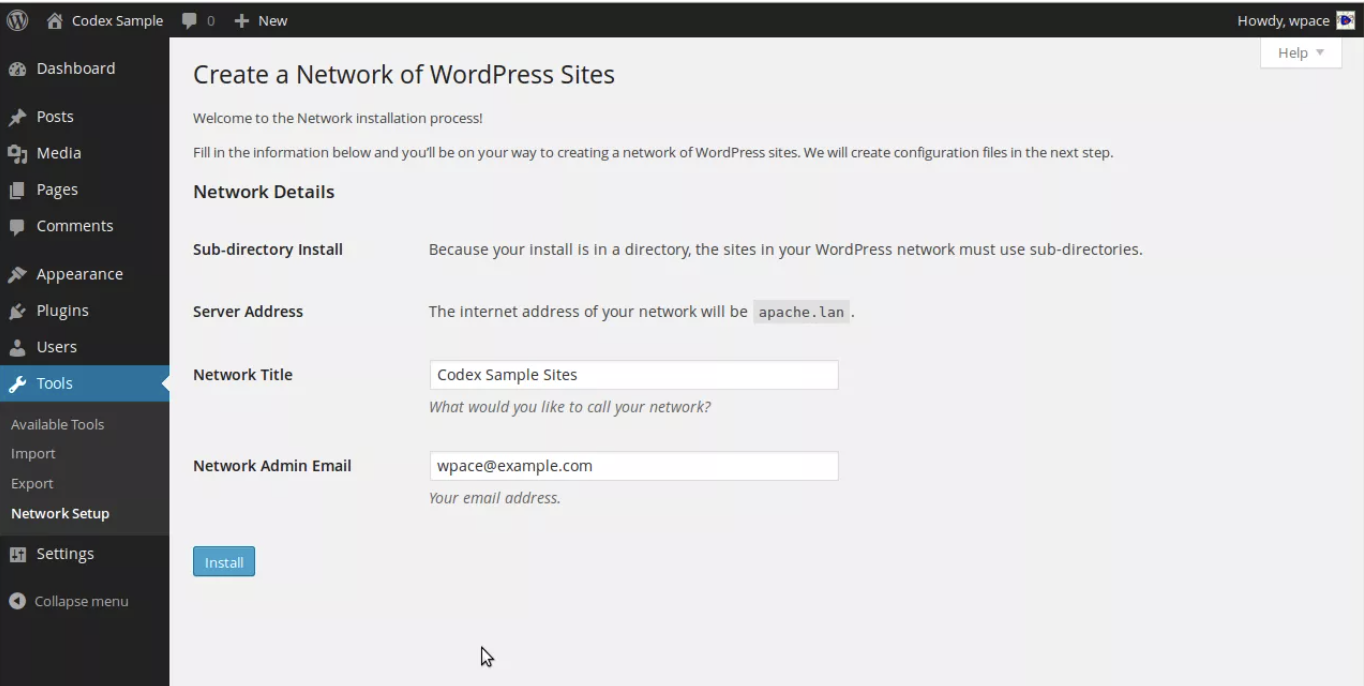
After that you will get some config & .htaccess adjustments you need to do. By default WP always wants to create a subdomain installation. For multilingual purpose we do recommend the Subdirectory installation. First you do not need new SSL certificates for each domain + you can have your setup like domain.com/en/ and domain.com/es/.
Replace the previous added allow_multisite config with the code below. Set subdomain install to true if you want to use custom domains per language or for agency <> clients setup.
define( 'MULTISITE', true );
define( 'SUBDOMAIN_INSTALL', false );
define( 'DOMAIN_CURRENT_SITE', 'www.yourdomain.com' );
define( 'PATH_CURRENT_SITE', '/' );
define( 'SITE_ID_CURRENT_SITE', 1 );
define( 'BLOG_ID_CURRENT_SITE', 1 );
Next replace the default WP .htaccess lines with these ones:
# BEGIN WordPress
RewriteEngine On
RewriteBase /
RewriteRule ^index.php$ - [L]

# add a trailing slash to /wp-admin
RewriteRule ^([_0-9a-zA-Z-]+/)?wp-admin$ $1wp-admin/ [R=301,L]

RewriteCond %{REQUEST_FILENAME} -f [OR]
RewriteCond %{REQUEST_FILENAME} -d
RewriteRule ^ - [L]
RewriteRule ^([_0-9a-zA-Z-]+/)?(wp-(content|admin|includes).*) $2 [L]
RewriteRule ^([_0-9a-zA-Z-]+/)?(.*.php)$ $2 [L]
RewriteRule . index.php [L]
# END WordPress
That is it.
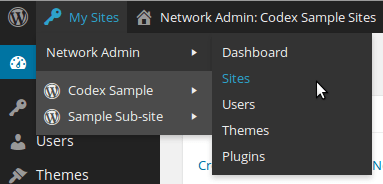
When everything is installed correctly you will now see in your WordPress site a new tab on top right called “My Sites“. From here you can see all sites and configure your network.
When using your multilingual multisite plugin you are also able to copy an existing site to a new one.
Did not found what you was looking for?
Please submit a ticket with a detailed explanation about your problem.
Submit TicketWhen you visit any web site, it may store or retrieve information on your browser, mostly in the form of cookies. Control your personal Cookie Services here.
I cannot copy the main website to the other multisite for translation. Am I missing something?