Après avoir installé notre plugin WordPress helpdesk, nous pouvons continuer à mettre en place les éléments de base. Dans votre tableau de bord d’administration, vous devriez voir le menu du service d’assistance (voir à droite). Si ce n’est pas le cas : Assurez-vous que le plugin Redux Framework est installé!
Les options suivantes sont proposées :
- Tous les billets
- Nouveau billet
- Statut
- Les types
- Systèmes / Projets
- Paramètres
- Rapports
Pages de configuration
Avant de commencer la configuration, nous devons créer 3 pages et placer les shortcodes ci-dessous :
- “Mes billets” -> [ my_tickets orderby=”date” order=”DESC”]
- “Nouveau billet” -> [ new_ticket type=”Simple|WooCommerce|Envato” types=”” departments=”” priorities=””]
- “Base de connaissances” -> [ knowledge_base columns=”2″ max_faqs=”5″ orderby=”order” order=”DESC”]
Bien sûr, vous pouvez changer le nom de votre page, l’important est simplement que le shortcode soit placé à cet endroit.
Paramètres généraux
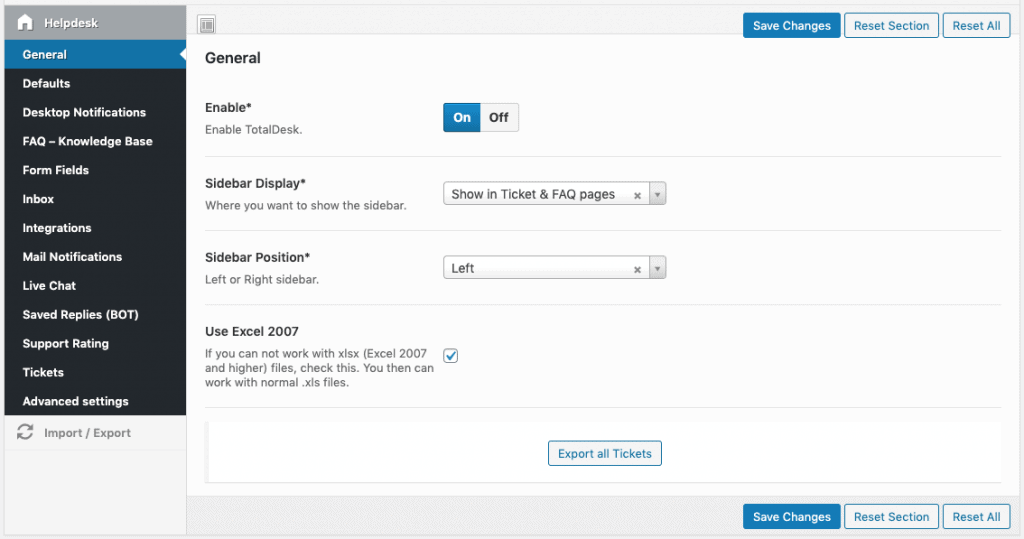
Après avoir configuré les pages, nous pouvons continuer à configurer le reste. Accéder aux paramètres. Vous pouvez y voir le panneau de toutes les options. Nous commençons par les aspects généraux :
- Activer le plugin
- Choisissez la page Mes billets (prenez celle que nous venons de créer)
- Rediriger les journalistes vers la page “Mes billets” si vous le souhaitez
- Choisissez si vous voulez utiliser Excel 2007 ou le plus récent (xlsx) pour l’exportation du ticket
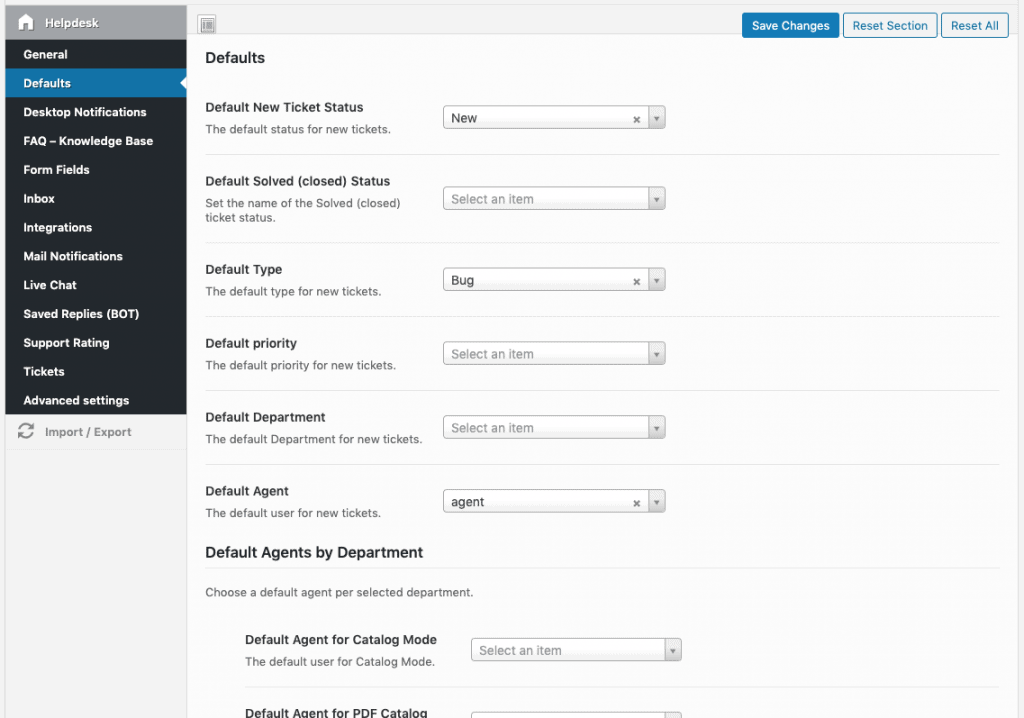
Définition des valeurs par défaut
Pour faciliter le travail, vous pouvez définir certaines valeurs par défaut. Bien entendu, vous devez créer les valeurs avant de définir les valeurs par défaut. Vous pouvez définir une valeur par défaut ..
- Statut
- Type
- Système
- Agent
Désormais, chaque fois qu’un nouveau ticket sera créé, les valeurs par défaut seront appliquées.
Configurer votre boîte de réception
Si vous disposez d’une boîte de réception pour l’assistance, à laquelle vos journalistes peuvent envoyer des courriels, vous devez la configurer ici. Les courriels seront alors automatiquement récupérés et créés en tant que ticket dans votre système.
Intégrations
Ici, vous pouvez activer des intégrations telles que WooCommerce, Envato ou Slack.
Envato Les intégrations Envato vous permettent de demander un code d’achat à vos utilisateurs, de vérifier le support jusqu’au paramètre ou de récupérer vos articles. Bien sûr, vous devez être un auteur sur envato. Saisissez votre nom d’utilisateur et votre jeton personnel (vous le trouverez ici).
WooCommerce Lorsque vous activez l’intégration de WooCommerce, tous vos clients verront un “mes-billets” & “nouveau billet” dans le tableau de bord de leur compte. Les nouveaux billets seront divisés en “Commande”, “Produit” & “Autres” question.
Slack Avec l’intégration Slack, vous pouvez envoyer des notifications de ticket directement dans l’un de vos canaux Slack. Personnalisez les notifications que vous souhaitez envoyer à Slack, créez un canal et une icône personnalisée si vous le souhaitez.
Notifications
L’une des principales fonctions est la notification par courrier électronique, qui permet à vos journalistes ou agents d’être tenus au courant. Comme pour les notifications de Slack, vous pouvez définir quelles informations doivent être envoyées et à qui. Il existe au total 4 types de notification :
- Création d’un nouveau ticket
- Statut modifié
- Commentaire ajouté
- Changement d’agent assigné
Après avoir configuré les types de notification, vous pouvez définir certaines valeurs par défaut pour la notification par courrier électronique, telles que le nom, le logo et l’adresse électronique. La réponse au courrier devrait être la même que votre boîte de réception (si vous l’utilisez).
Champs du formulaire
Tous les champs des formulaires de ticket sont personnalisables, à l’exception de l’objet et du message, qui sont obligatoires pour créer un ticket. Au total, il existe 3 formes différentes :
- Formulaire simple (pour toutes les questions)
- Envato Form (pour les articles spéciaux Envato, où e.g. un code d’achat est nécessaire)
- Formulaire WooCommerce (pour les commandes, les produits, etc).)
Vous pouvez utiliser les trois ou un seul en fonction de vos besoins. To setup a nouveau billet form you can use the shortcode [ new_ticket type=”Simple|WooCommerce|Envato” types=”” departments=”” priorities=””] and in addition you can setup the type ]
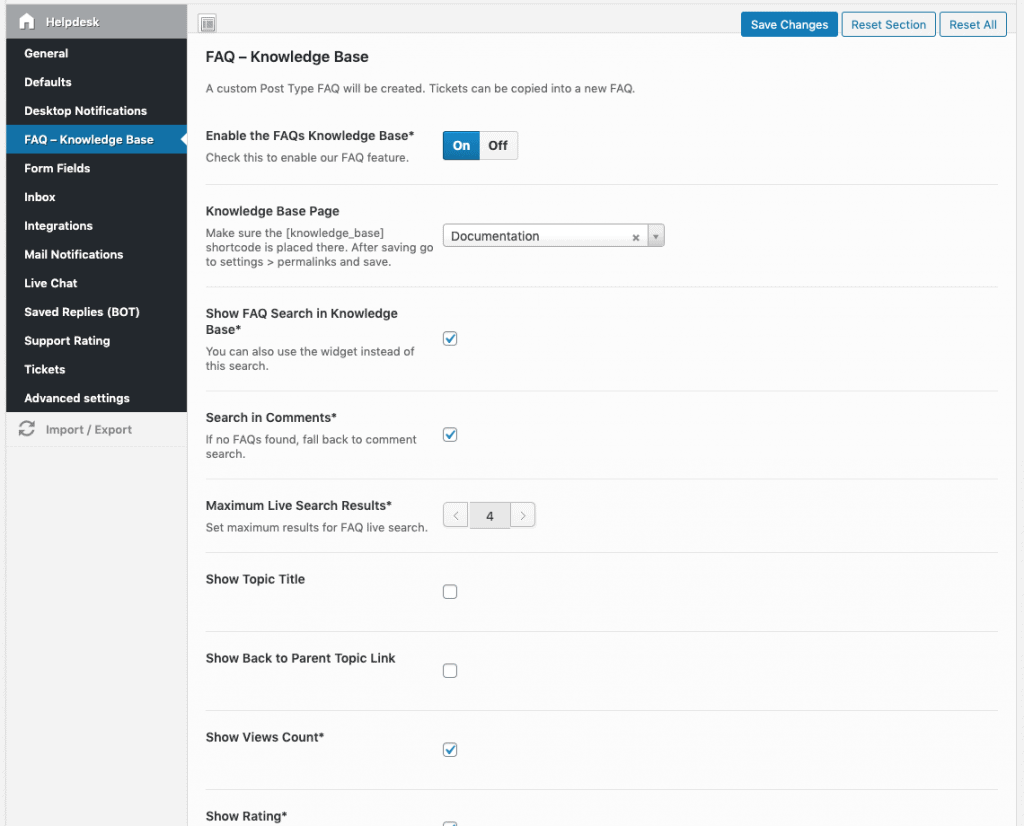
Base de connaissances Paramètres
Lorsque vous activez la base de connaissances, un nouveau type de menu s’affiche après le rechargement du panneau d’administration, appelé “FAQ”. Here you can create FAQ & Topics, what will be rendered within the [ knowledge_base columns=”2″ max_faqs=”5″ orderby=”order” order=”DESC”] shortcode. En outre, vous pouvez activer la recherche dans la FAQ et choisir une mise en page (encadrée ou en liste).
Paramètres de réponse enregistrés
Lorsque vous activez les réponses sauvegardées, vous verrez un bouton bleu sur les commentaires de ticket appelé “créer une réponse enregistrée”. Cela permet de copier l’ensemble du commentaire dans une nouvelle réponse enregistrée, qui peut être utilisée pour des réponses ultérieures.
Lors de la création d’un commentaire, notre plugin vérifie le contenu du ticket et tente de trouver “Réponses suggérées” sur la base de mots-clés automatiquement.
Paramètres du Live Chat
L’activation du chat en direct aura pour effet d’afficher le chat en direct en bas à droite de toutes vos pages. Il est très important de savoir que toutes les conversations par chat seront sauvegardées en tant que ticket pour des rapports ultérieurs, etc.
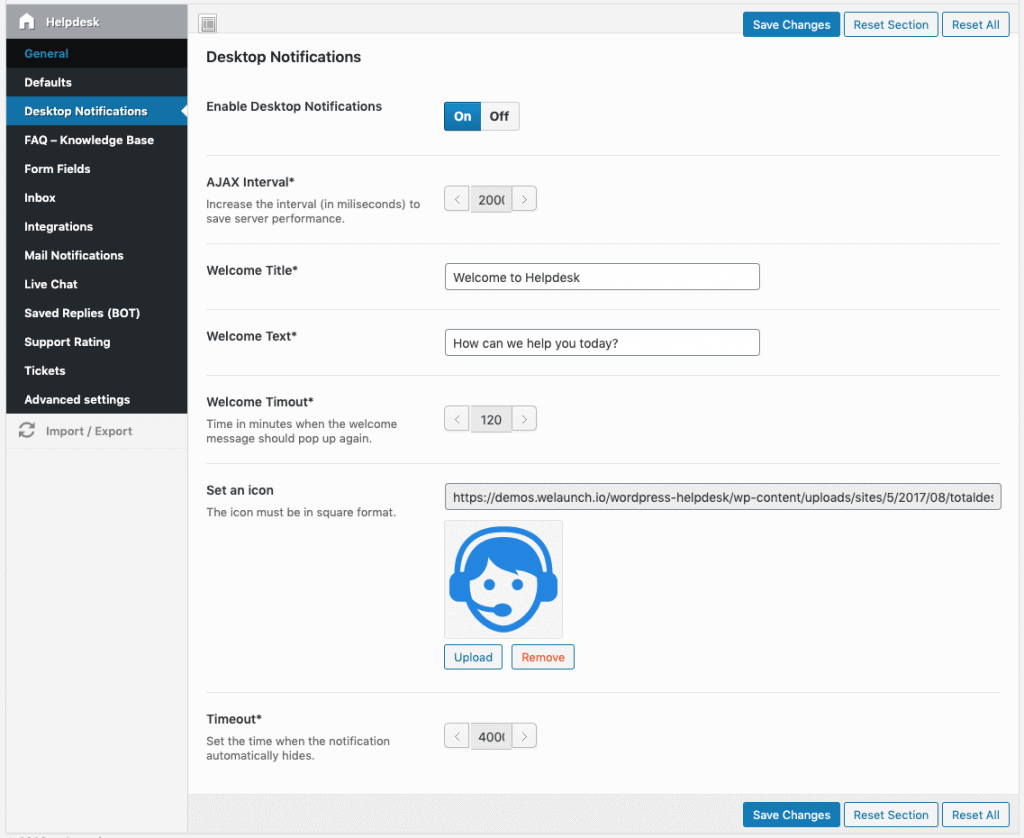
Paramètres de notification du bureau
Les notifications de bureau, lorsqu’elles sont activées, s’affichent la première fois qu’un utilisateur visite votre site et TOUJOURS lorsqu’un nouveau commentaire a été ajouté à un ticket de rapporteur.
Paramètres avancés
Dans les paramètres avancés, vous pouvez modifier le modèle de notification de courrier, ajouter des feuilles de style CSS ou Javascript personnalisées.