Menu et paramètres généraux
Pour configurer le plugin, vous devez être en mesure de voir le menu Fire Push dans votre panneau d’administration. Si vous ne voyez pas ce menu, assurez-vous que le plugin Redux Framework est installé et activé.Dans la partie des paramètres généraux, vous pouvez activer notre plugin. Vous pouvez également désactiver l’enregistrement des jetons d’invité ici : Les jetons sont utilisés pour envoyer des notifications aux utilisateurs. Si vous ne souhaitez pas envoyer de notification aux utilisateurs déconnectés, désactivez cette option pour n’enregistrer les jetons que pour les utilisateurs connectés.En outre, vous pouvez activer l’envoi de SMS (nécessite un compte ClickSend), suivre les clics de notification et supprimer les abonnés qui n’ont pas répondu à l’appel.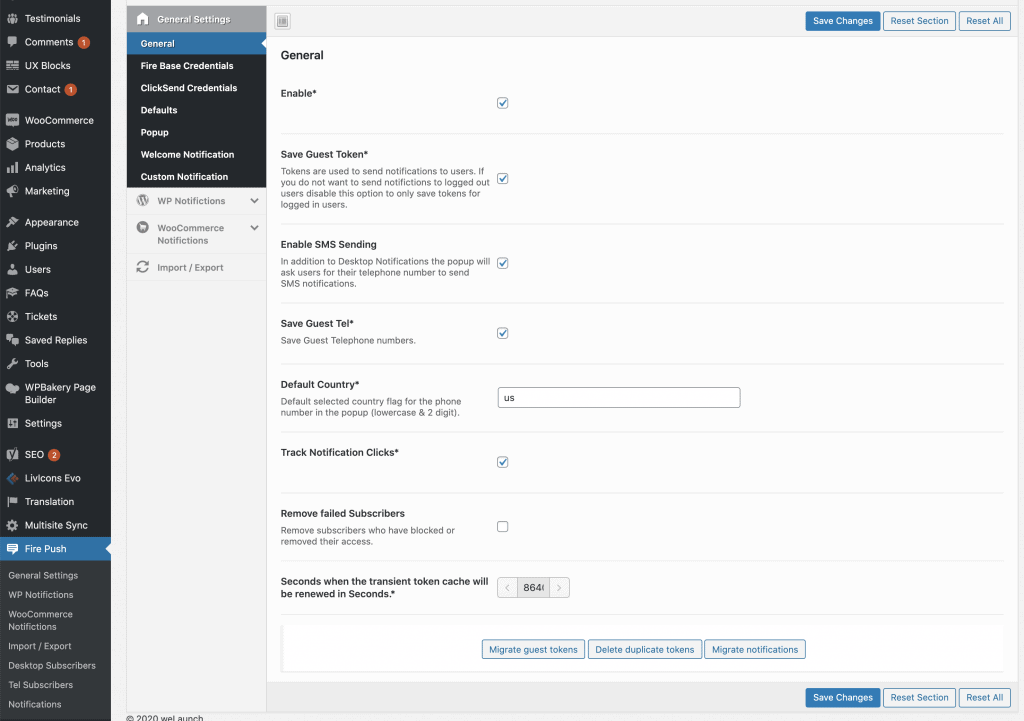
Informations d’identification Firebase
In the credentials tab you need to enter the credentials you copied from ourprevious article, where we created a firebase project.
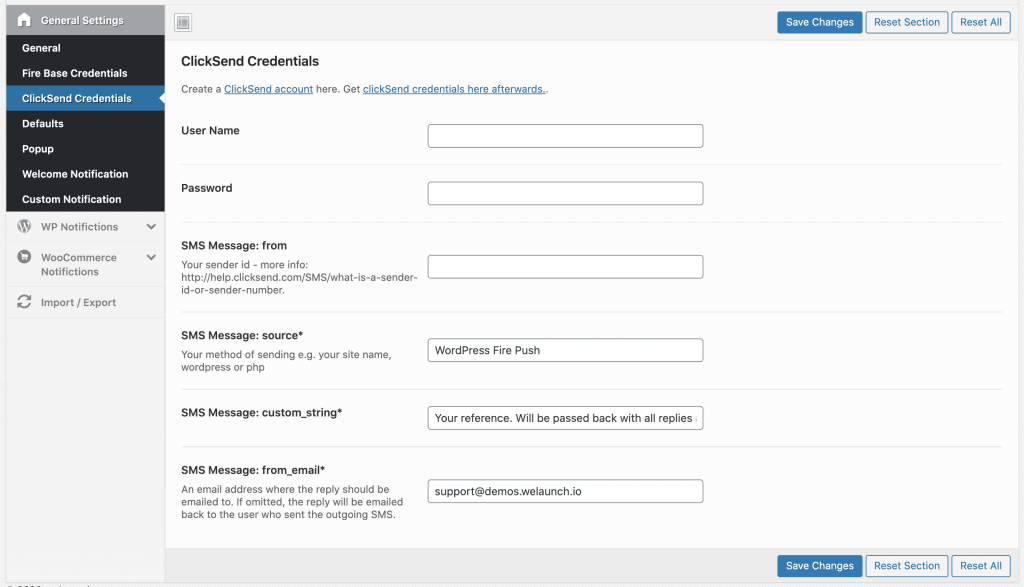
ClickSend pour l’envoi de SMS
Pour envoyer des notifications par SMS via notre plugin WordPress, vous devez disposer d’un compte ClickSend.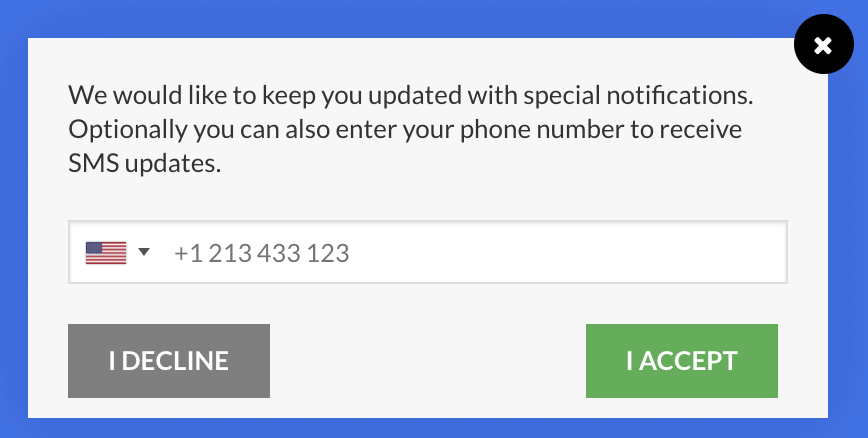
Paramètres de notification par défaut
Les paramètres de notification par défaut seront utilisés si aucun paramètre particulier n’est spécifié. Un exemple : Si vous n’indiquez pas d’icône personnalisée dans les notifications d’articles publiés, l’icône par défaut sera utilisée.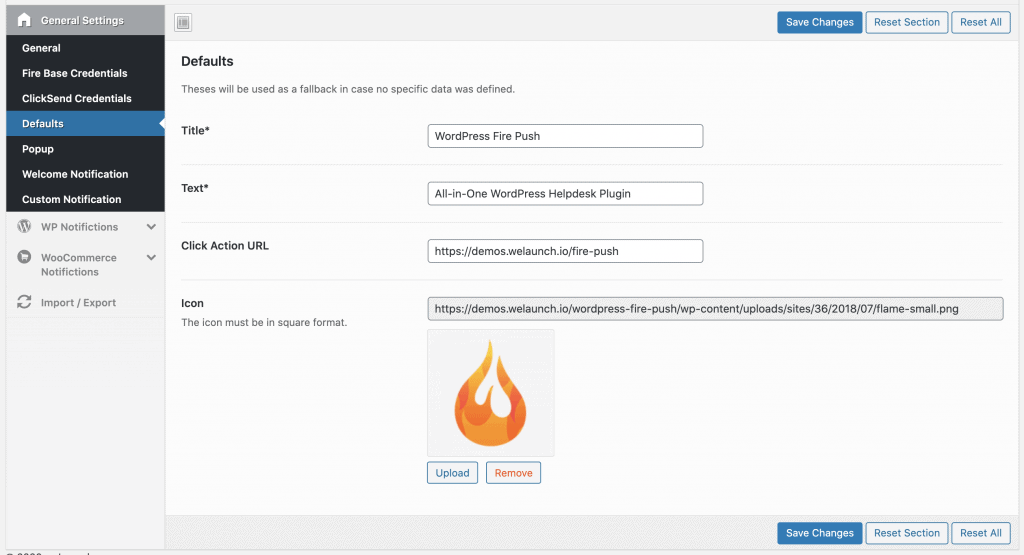
Popup
Dans l’onglet popup, vous pouvez configurer l’aspect de la popup qui s’affiche pour que l’utilisateur obtienne l’autorisation de notifier. Vous pouvez définir une position (en haut ou en bas), un style (pleine largeur ou petite largeur) et vous pouvez configurer les textes et les couleurs.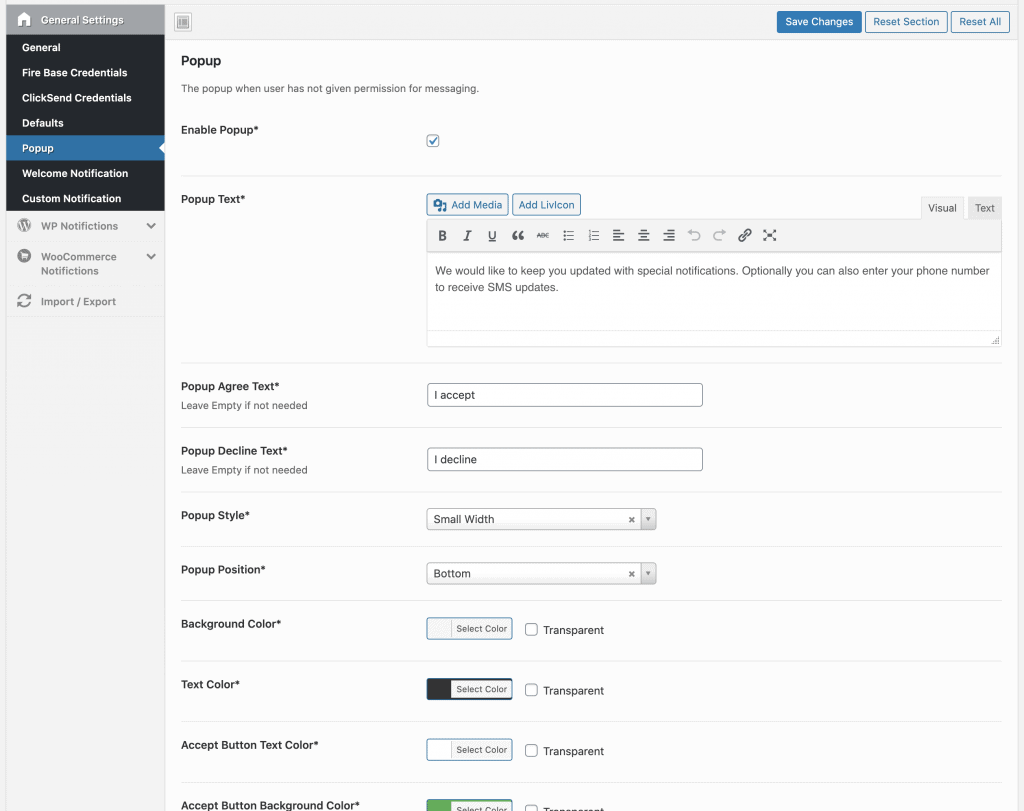
Message de bienvenue
Vous pouvez activer un message de bienvenue personnalisé si un utilisateur a donné son accord pour recevoir des notifications push de votre site web. Quelque chose comme “merci de vous abonner à notre site”.
Notification personnalisée
Envoyer des notifications push personnalisées en saisissant le titre, le texte et l’URL du lien. Cliquez ensuite sur enregistrer, puis sur envoyer.Vous devez enregistrer les paramètres avant de cliquer sur “Enregistrer”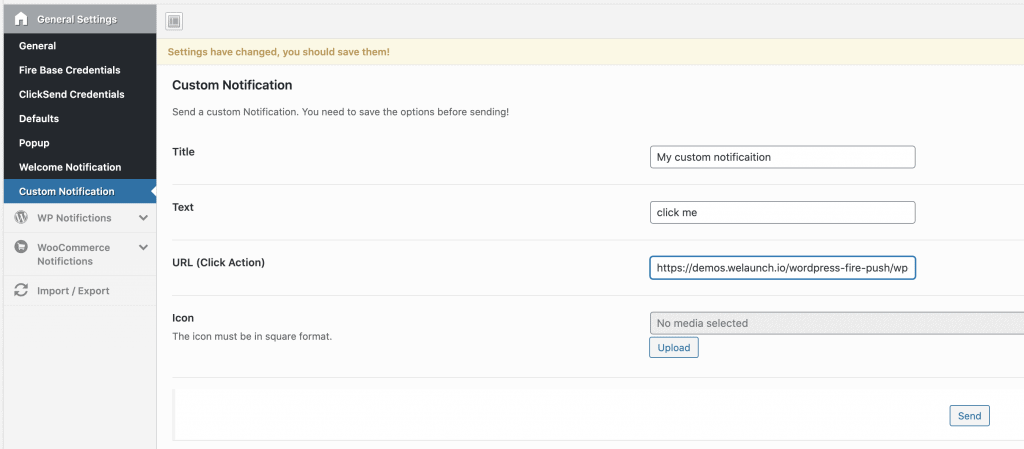
Notifications WordPress
Au total, vous pouvez créer 4 notifications WordPress automatiques et personnalisées. Vous pouvez définir si une notification doit être envoyée lorsqu’un nouvel article est publié, mis à jour ou qu’un nouveau commentaire a été fait. En outre, vous pouvez définir les types de messages auxquels les messages doivent s’appliquer et les rôles auxquels ils doivent être envoyés.Vous pouvez également définir un titre, un texte et une URL dynamiques basés sur TOUTES les données de l’article et les métadonnées. Nous avons récupéré l’objet complet du message, les méta-données du message et les données du commentaire (s’il s’agit d’un commentaire), que vous pouvez utiliser.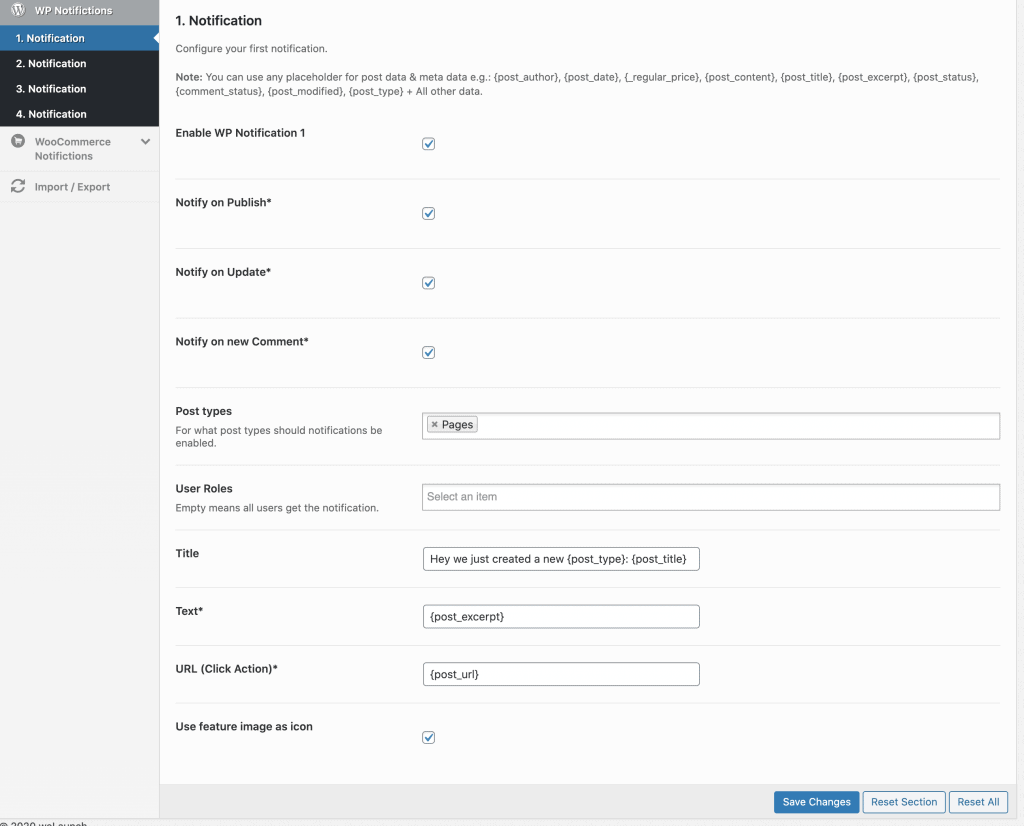
WooCommerce New Product Notification
Indiquez si vous souhaitez envoyer des notifications automatiques à chaque fois qu’un nouveau produit est créé.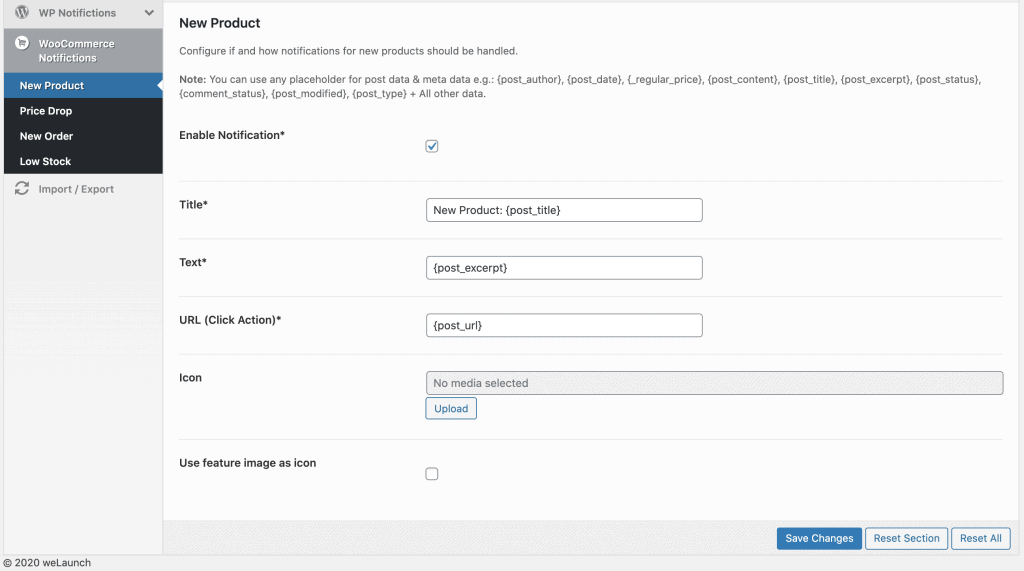
WooCommerce Price Drop Notification
Configure if you want to send automatic notifications every time a price of a product has dropped.
Notification de nouvelle commande WooCommerce
Indiquez si vous souhaitez envoyer des notifications automatiques chaque fois qu’une nouvelle commande a été créée. Ce message ne sera envoyé qu’aux administrateurs et aux gérants de magasins.
WooCommerce – Notification de rupture de stock
Indiquez si vous souhaitez envoyer des notifications automatiques chaque fois qu’un produit est en rupture de stock. Ce message ne sera envoyé qu’aux administrateurs et aux gérants de magasins.
Abonnés
Dans la page du menu des abonnés, vous verrez tous les utilisateurs et les utilisateurs invités, y compris leur jeton que vous avez obtenu pour envoyer des notifications push.
Notifications envoyées
Dans la page de menu des notifications, vous verrez toutes les notifications qui ont été envoyées. Vous voyez également combien ont réussi et combien ont échoué.