Menú Ajustes
Con el fin de configurar el plugin que debe ser capaz de ver el menú de atributos de imágenes en WooCommerce en su panel de administración. Si no puedes ver este menú asegúrate de que el plugin Redux Framework está instalado y activado.
Ajustes generales
En la parte de configuración general puede activar nuestro plugin, activar la información sobre herramientas para mostrar y establecer si desea mostrar imágenes de atributos en el “información adicional” y en las variaciones.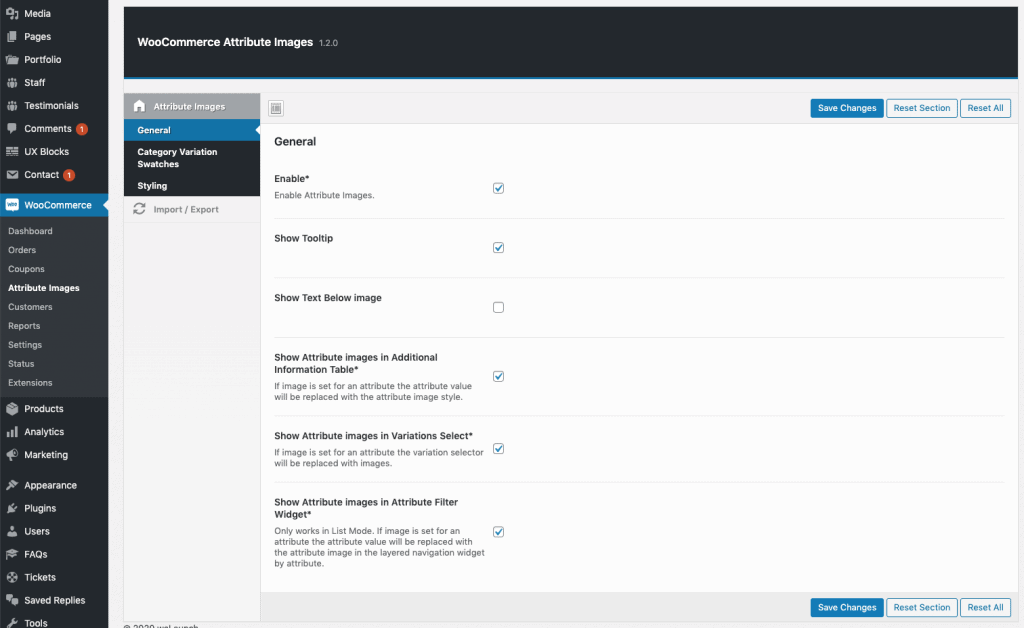
Categoría Variación Muestras Ajustes
Si desea mostrar muestras de variaciones directamente en el bucle de su tienda, debe activar la función aquí. Asegúrate de ajustar las opciones de imagen, precio y selector de enlaces a tu tema. Puede utilizar cejas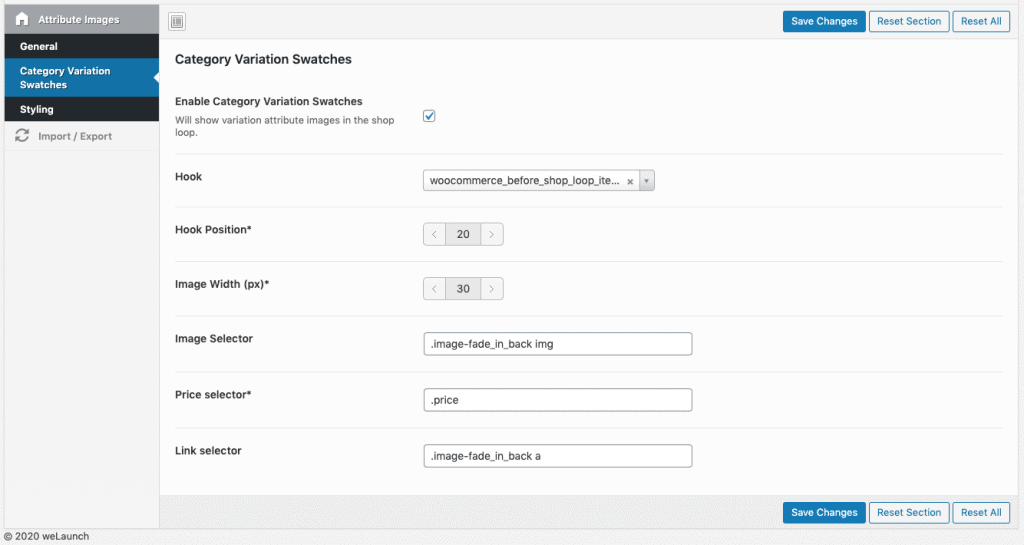
Opciones de estilo
Además, puede configurar algunas opciones de estilo. Aquí puede aplicar estilo al nombre o valor del atributo con el color del borde, el radio del borde, el ancho de la imagen, etc.Siguiente: Establecer imágenes de atributos
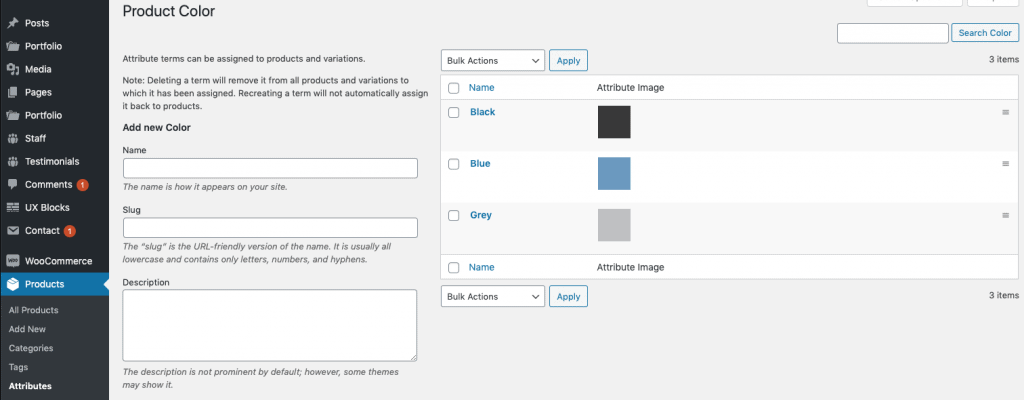
Asignar imágenes a atributos
Después de la configuración, puede empezar a asignar imágenes a los términos de atributos de WooCommerce. Simplemente vaya a WP-Admin > Productos > Atributos. A continuación, configure el término que desee e.g. Color. Ahora, al crear un nuevo valor de atributo o editar uno existente, aparece un campo para adjuntar una imagen. Guardar y listo.