Menú Ajustes
Con el fin de configurar el plugin debe ser capaz de ver el menú de facturas PDF en WooCommerce en su panel de administración. Si no puedes ver este menú asegúrate de que el plugin Redux Framework está instalado y activado.
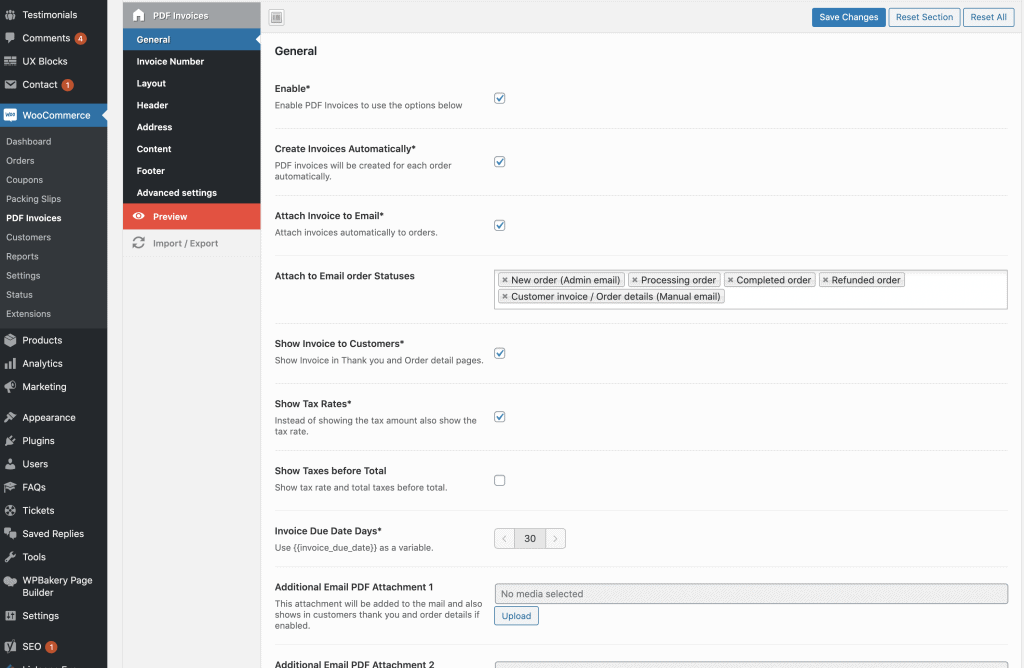
Configuración general
En la parte de ajustes generales puedes:
- Creación automática de facturas Se crearán automáticamente facturas en PDF para cada pedido.
- Adjuntar factura al correo electrónico Adjuntar facturas automáticamente a los pedidos.
- Mostrar factura a los clientes Mostrar factura en las páginas de agradecimiento y de detalles del pedido.
- Mostrar tipos impositivos* En lugar de mostrar el importe del impuesto, muestre también el tipo impositivo.
- Renderizar factura en lugar de descargar En lugar de descargar la factura mostrará el PDF directamente en el navegador.
- Adjuntar documentos PDF personalizados a mensajes de correo electrónico
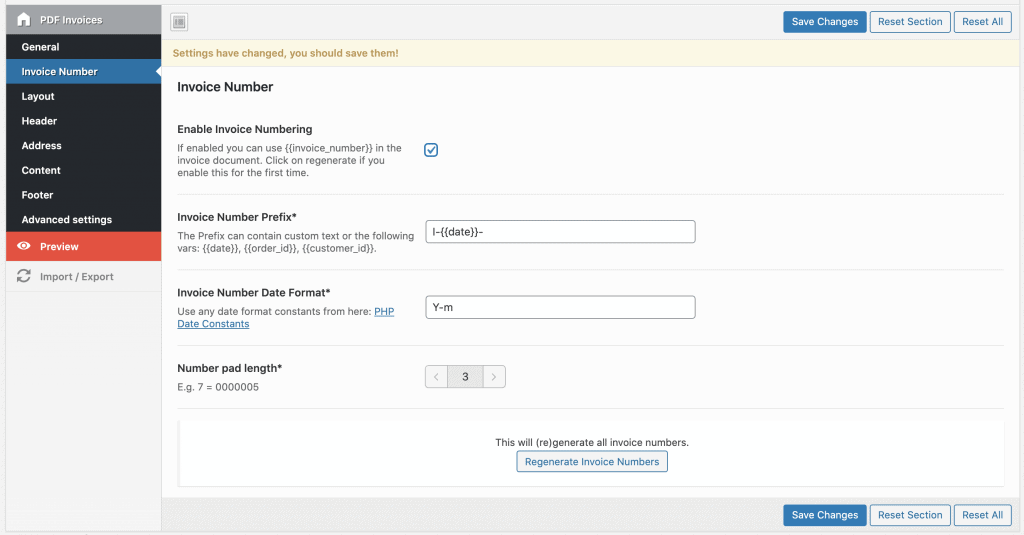
Numeración de facturas
Nuestro plugin incorpora una función de numeración de facturas. Se establece un prefijo numérico personalizado seguido de una opción de formato de fecha personalizada.
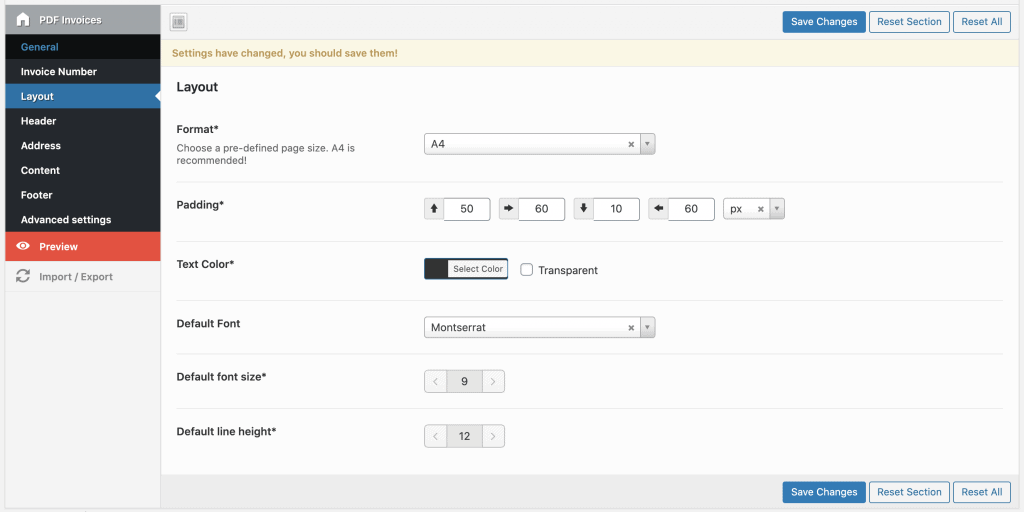
Configuración del diseño
En la sección de diseño puede establecer un relleno personalizado. Además, puede elegir la familia de fuentes, el tamaño, el color y la altura de línea predeterminados. También se admiten algunas fuentes personalizadas de Google.
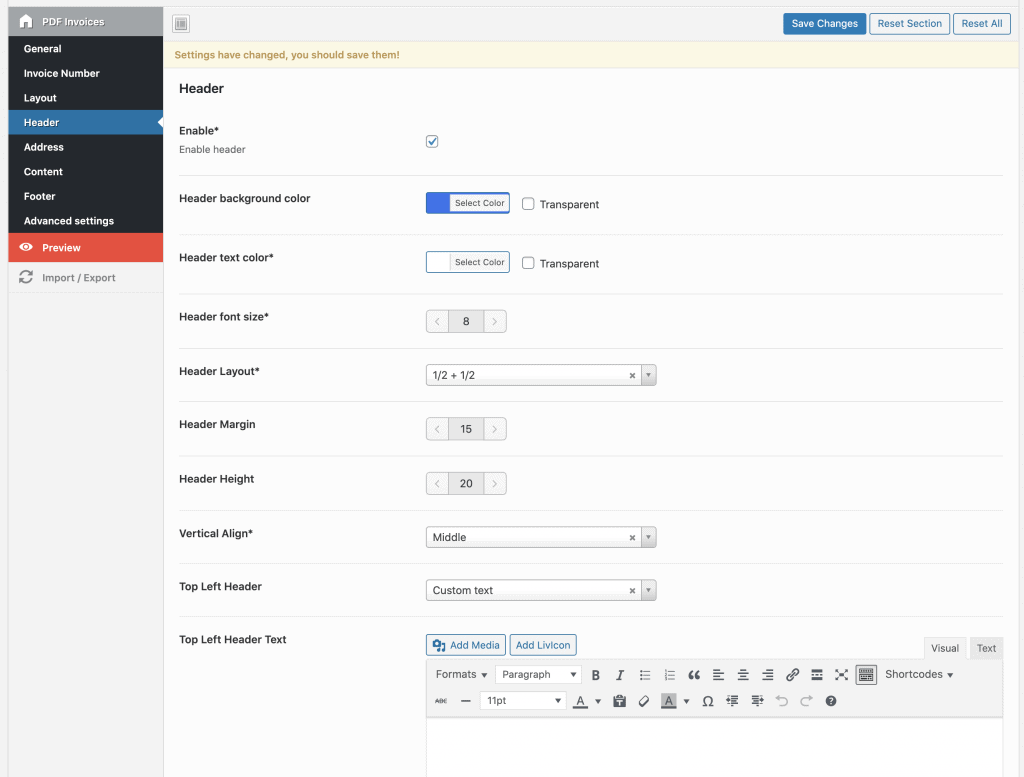
Configuración de la cabecera de la factura
Un encabezado estático, que se aplicará en todas las páginas se puede activar si lo desea. Aquí puede mostrar 1, 2 o 3 columnas con información personalizada. Por ejemplo, un logotipo, un texto personalizado, la información de exportación o el número de página.
Configuración de la dirección de facturación
El campo de dirección es el que se encuentra antes de que empiecen las líneas de artículos del producto. Aquí tiene los campos de texto de dirección izquierdo y derecho. Dentro de estos campos puede utilizar variables de campo de datos de pedido o escribir textos personalizados que incluyan imágenes o HTML. Los datos variables siempre empiezan y terminan con {{ }}. Haga clic aquí para ver todos los campos de datos de factura que puede utilizar.
Ejemplo de texto de dirección a la izquierda:
WeLaunch – In den Sandbergen – 49808 Lingen (Ems){{billing_company}}{{billing_first_name}}{{billing_last_name}}{{billing_address_1}}{{billing_address_2}}{{_billing_postcode}}{{_billing_city}}{{_billing_state}}{{_billing_country}}
Ejemplo de texto de dirección derecha:
Nº de factura. {{id}}Fecha de facturación {{order_created}}Número de cliente. {{customer_id}}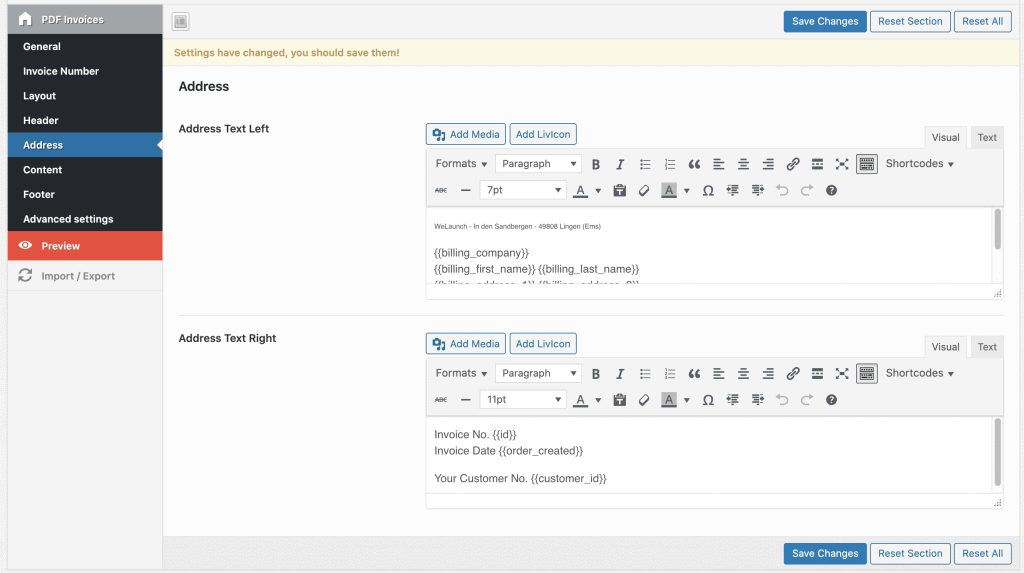
Ajustes de contenido
En la sección de contenido puede añadir un texto personalizado de introducción o de despedida de la factura, incluyendo también variables. Además, puedes modificar a tu gusto los colores de las filas pares e impares.
Ejemplo de texto introductorio de factura:
Nº de factura {{id}}
Dear {{billing_first_name}}{{billing_last_name}},thank you very much for your order and the trust you have placed in!Por la presente le facturo lo siguiente:
Ejemplo de texto final de factura:
Por favor, transfiera el importe de la factura con el número de factura a la cuenta indicada a continuación.El importe de la factura vence inmediatamente.Forma de pago: {{payment_method_title}}Método de envío: {{shipping_method_title}}Su Nota: {{customer_note}}Suya sinceramenteWeLaunch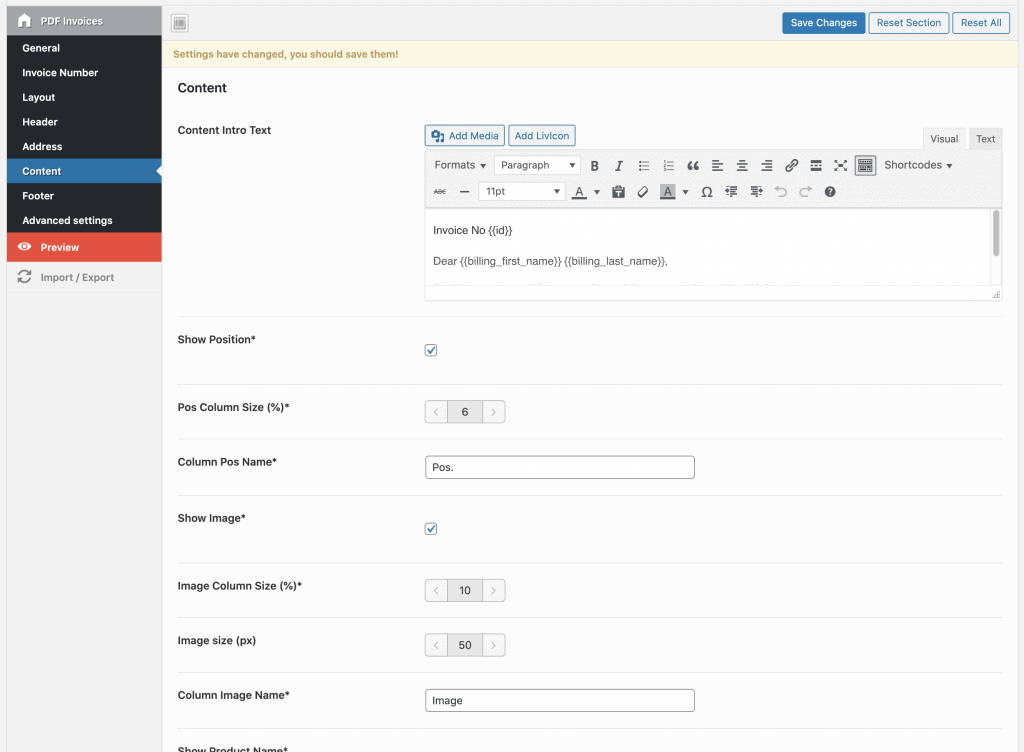
Configuración del pie de página
Al igual que en la cabecera de la factura, también puede establecer un pie de factura estático. Puede contener un máximo de 4 columnas, incluidos los textos personalizados. Aquí puede mostrar los datos de su empresa, la información de su cuenta bancaria o la información sobre el IVA.
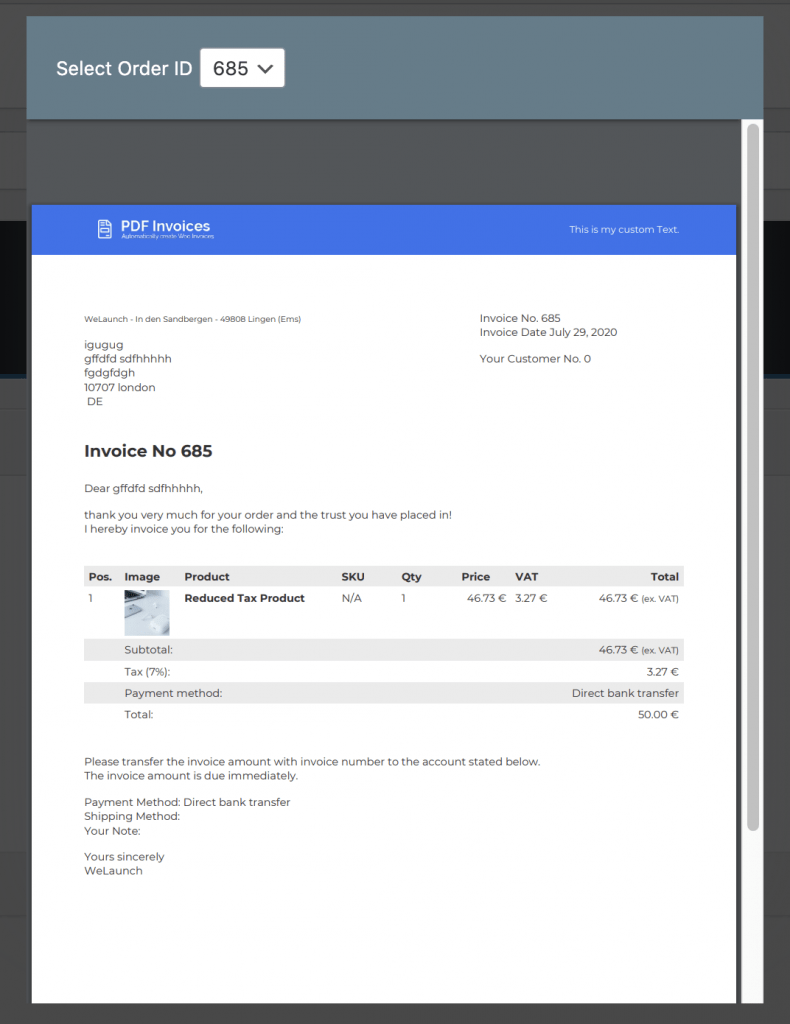
Función de vista previa
Digamos que has configurado el plugin y guardado los ajustes. Ahora quiere comprobar cómo quedarán las facturas PDF generadas, pero ¿cómo? Es muy sencillo: sólo tiene que hacer clic en la pestaña de vista previa de la configuración del complemento, allí podrá elegir un ID de pedido y ver cómo quedará el PDF. Tan sencillo como esto.
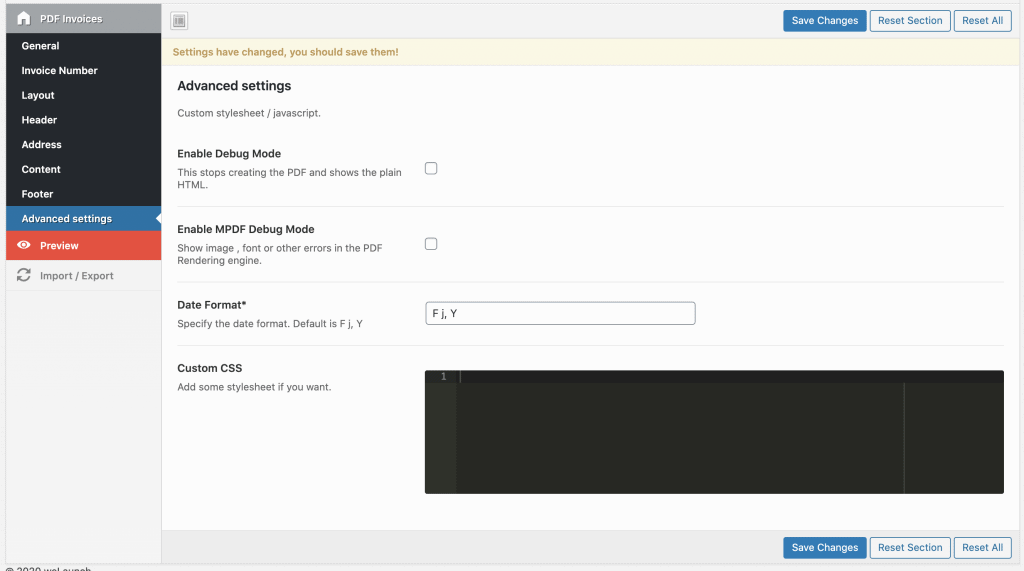
Configuración avanzada
Si desea añadir CSS personalizado a sus facturas PDF puede hacerlo aquí. Activa el modo de depuración, añade CSS personalizado y comprueba qué etiquetas HTML puedes utilizar.
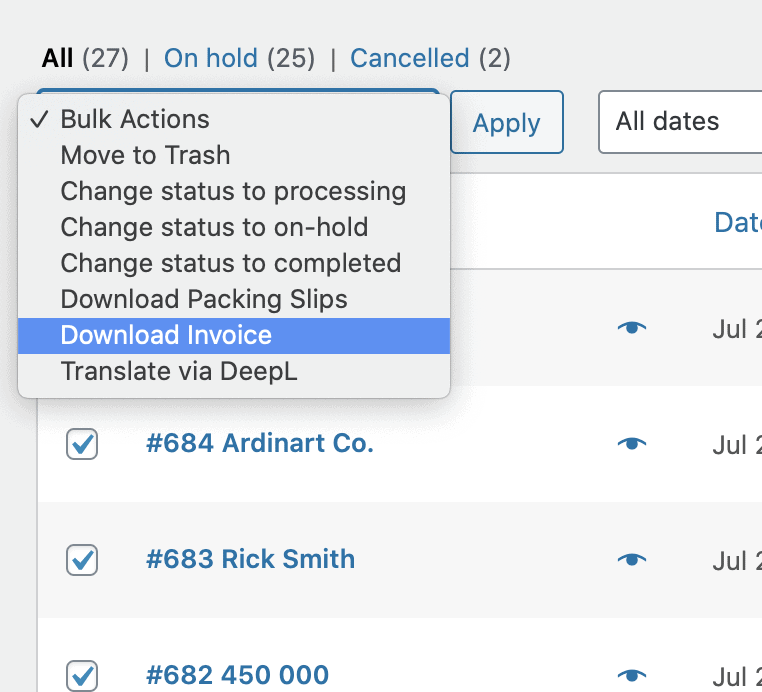
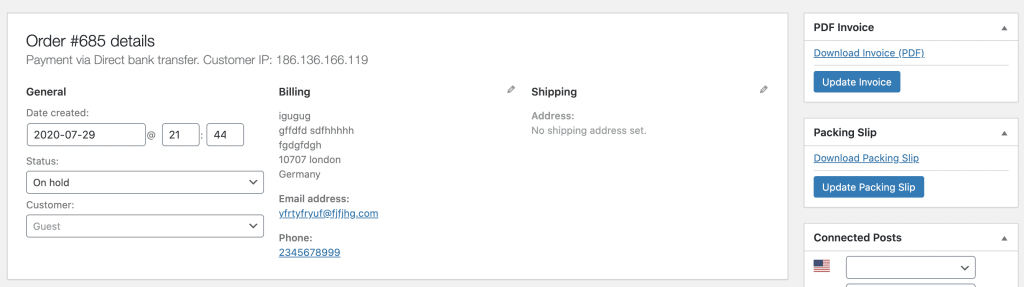
Utilización / Descarga de facturas
Las facturas y albaranes de WooCommerce se pueden descargar desde la página de resumen de pedidos o desde la página de pedido individual. Por supuesto, los clientes pueden descargar sus facturas en pdf desde la sección de mi cuenta. En el resumen de pedidos también puede descargar facturas de forma masiva.