Cuando desee crear una página de contacto de la tienda, puede utilizar cualquier plugin de formulario de contacto. Preferido, y esto es lo que usamos, es el plugin Contact Form 7.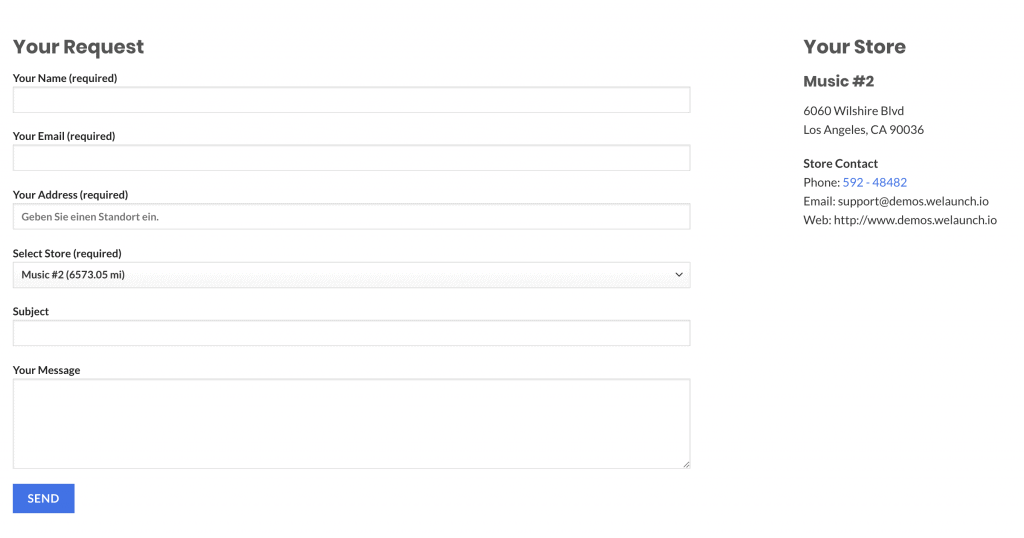
Paso 1: Crear el formulario de contacto
Primero tienes que crear un formulario de contacto de la tienda de contactos.Vaya a Contacto > Añadir nuevo e introduzca los datos del formulario. Aquí es muy importante, que usted tiene un campo de selección con el id “store_locator_form_store_select” y un campo de texto para la dirección del cliente “store_locator_form_customer_address”. Si no existen, no funcionará.Luego puedes crear otros campos y si quieres pasar datos de la tienda puedes usar los siguientes campos de entrada:
- store_locator_form_store_select
- store_locator_store_info_name
- store_locator_store_info_address
- store_locator_store_info_city
- store_locator_store_info_region
- store_locator_store_info_zip
- store_locator_store_info_telephone
- store_locator_store_info_email
- store_locator_store_info_website
- store_locator_form_store_name
- store_locator_form_store_address
- store_locator_form_store_zip
- store_locator_form_store_city
- store_locator_form_store_country
- store_locator_form_store_region
- store_locator_form_store_telephone
- store_locator_form_store_mobile
- store_locator_form_store_fax
- store_locator_form_store_email
- store_locator_form_store_website
Puede omitir los datos de la tienda o incluso ocultarlos. Si, por ejemplo, sólo desea mostrar el país de la tienda, puede omitir el campo de entrada de texto. Los campos también pueden utilizarse para enviar solicitudes directamente a sus tiendas.Have a look at our demo contact form here:Demo Store Contact Form
Paso 2: Crear la página de la tienda de contactos
Una vez creado el formulario de contacto, debe incrustarlo en una página. Cree una nueva página llamada “Contactar con la tienda” y elija el formulario de contacto.
Paso 3: Ajustar la configuración del plugin
Cuando el formulario de contacto y la página estén configurados, deberá activar el botón de acción Contactar con la tienda. Vaya a la configuración del plugin > Mostrar datos > Activar Mostrar tienda de contactos. Añade un texto personalizado como “Contactar con la tienda” y seleccione la página Contactar con la tienda, que acaba de crear.Ahora cuando vayas al localizador de tiendas verás un botón llamado “Contactar con la tienda”. Al hacer clic en esta dirección desde el localizador de tiendas, la tienda seleccionada Y la dirección se transferirán a la página.A continuación, el cliente sólo tiene que introducir sus datos, como nombre, correo electrónico, asunto y mensaje, y ya está.